RabbitMQ通过websocket与前端通信
编辑于 2022-06-27 14:45:07 阅读 4465
本文主要介绍的是RabbitMQ的一个插件 —— STOMP,还有一个MQTT插件,也是不错的选择,详见:RabbitMQ插件之MQTT
如何安装rabbitmq,请移步:http://www.cuiwei.net/p/1371869141
启用stomp插件
vi enabled_plugins
[...,rabbitmq_stomp,rabbitmq_web_stomp].
重启rabbitmq后,访问 RabbitMQ Management
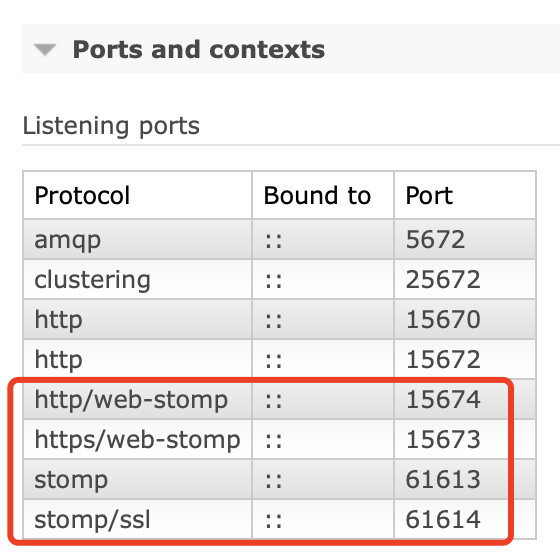
可以看到
- http/web-stomp服务(ws)已经启动了,在15674端口上了
- https/web-stomp服务(wss)已经启动了,在15673端口上了
- stomp服务(tcp)已经启动了,在61613端口上
- stomp/ssl服务(ssl)已经启动了,在61614端口上
tcp/ssl
tcp://localhost:61613
ssl://localhost:61614
cat /etc/rabbitmq/conf.d/23-stomp-ssl.conf
ssl_options.cacertfile = /etc/rabbitmq/cert/ca.cer
ssl_options.certfile   = /etc/rabbitmq/cert/www.cuiwei.net.pem
ssl_options.keyfile    = /etc/rabbitmq/cert/www.cuiwei.net.key
ssl_options.verify     = verify_peer
ssl_options.fail_if_no_peer_cert  = true

stomp.listeners.tcp.1 = 61613
# default TLS-enabled port for STOMP connections
stomp.listeners.ssl.1 = 61614
TLS (WSS)
具体项目中,是使用ws,还是wss,取决于当前域名,如果当前域名是https,就只能使用wss,如果当前域名是http,就只能使用ws
这个插件默认支持ws,直接用ws://127.0.0.1:15674/ws就行
wss需要一些配置才能使用wss://127.0.0.1:15673/ws1️⃣
cat /etc/rabbitmq/conf.d/25-web-stomp-ssl.conf
web_stomp.tcp.port = 15674
web_stomp.ssl.port       = 15673
web_stomp.ssl.backlog    = 1024
web_stomp.ssl.cacertfile = /etc/rabbitmq/cert/ca.cer
web_stomp.ssl.certfile   = /etc/rabbitmq/cert/www.cuiwei.net.pem
web_stomp.ssl.keyfile    = /etc/rabbitmq/cert/www.cuiwei.net.key
# web_stomp.ssl.password   = changeme
如上,用到3个文件,这些文件和配置https用的是一样的。
详见:http://www.cuiwei.net/p/1135009574/
应用场景
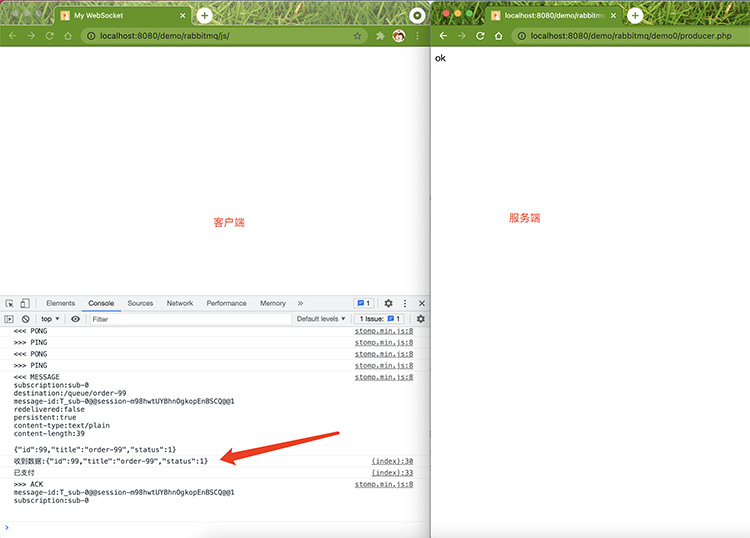
做过微信h5支付的应该都知道,用户支付完会出现等待页面,在这个页面 前端会通过不断请求服务端接口的方式 获取支付结果。这种轮询的方式会对服务器造成一定的压力,下面我们就用 RabbitMQ 实现一下
先看下结果,如下图。客户端订阅order-99的队列,服务向order-99推数据,客户端可以实时收到
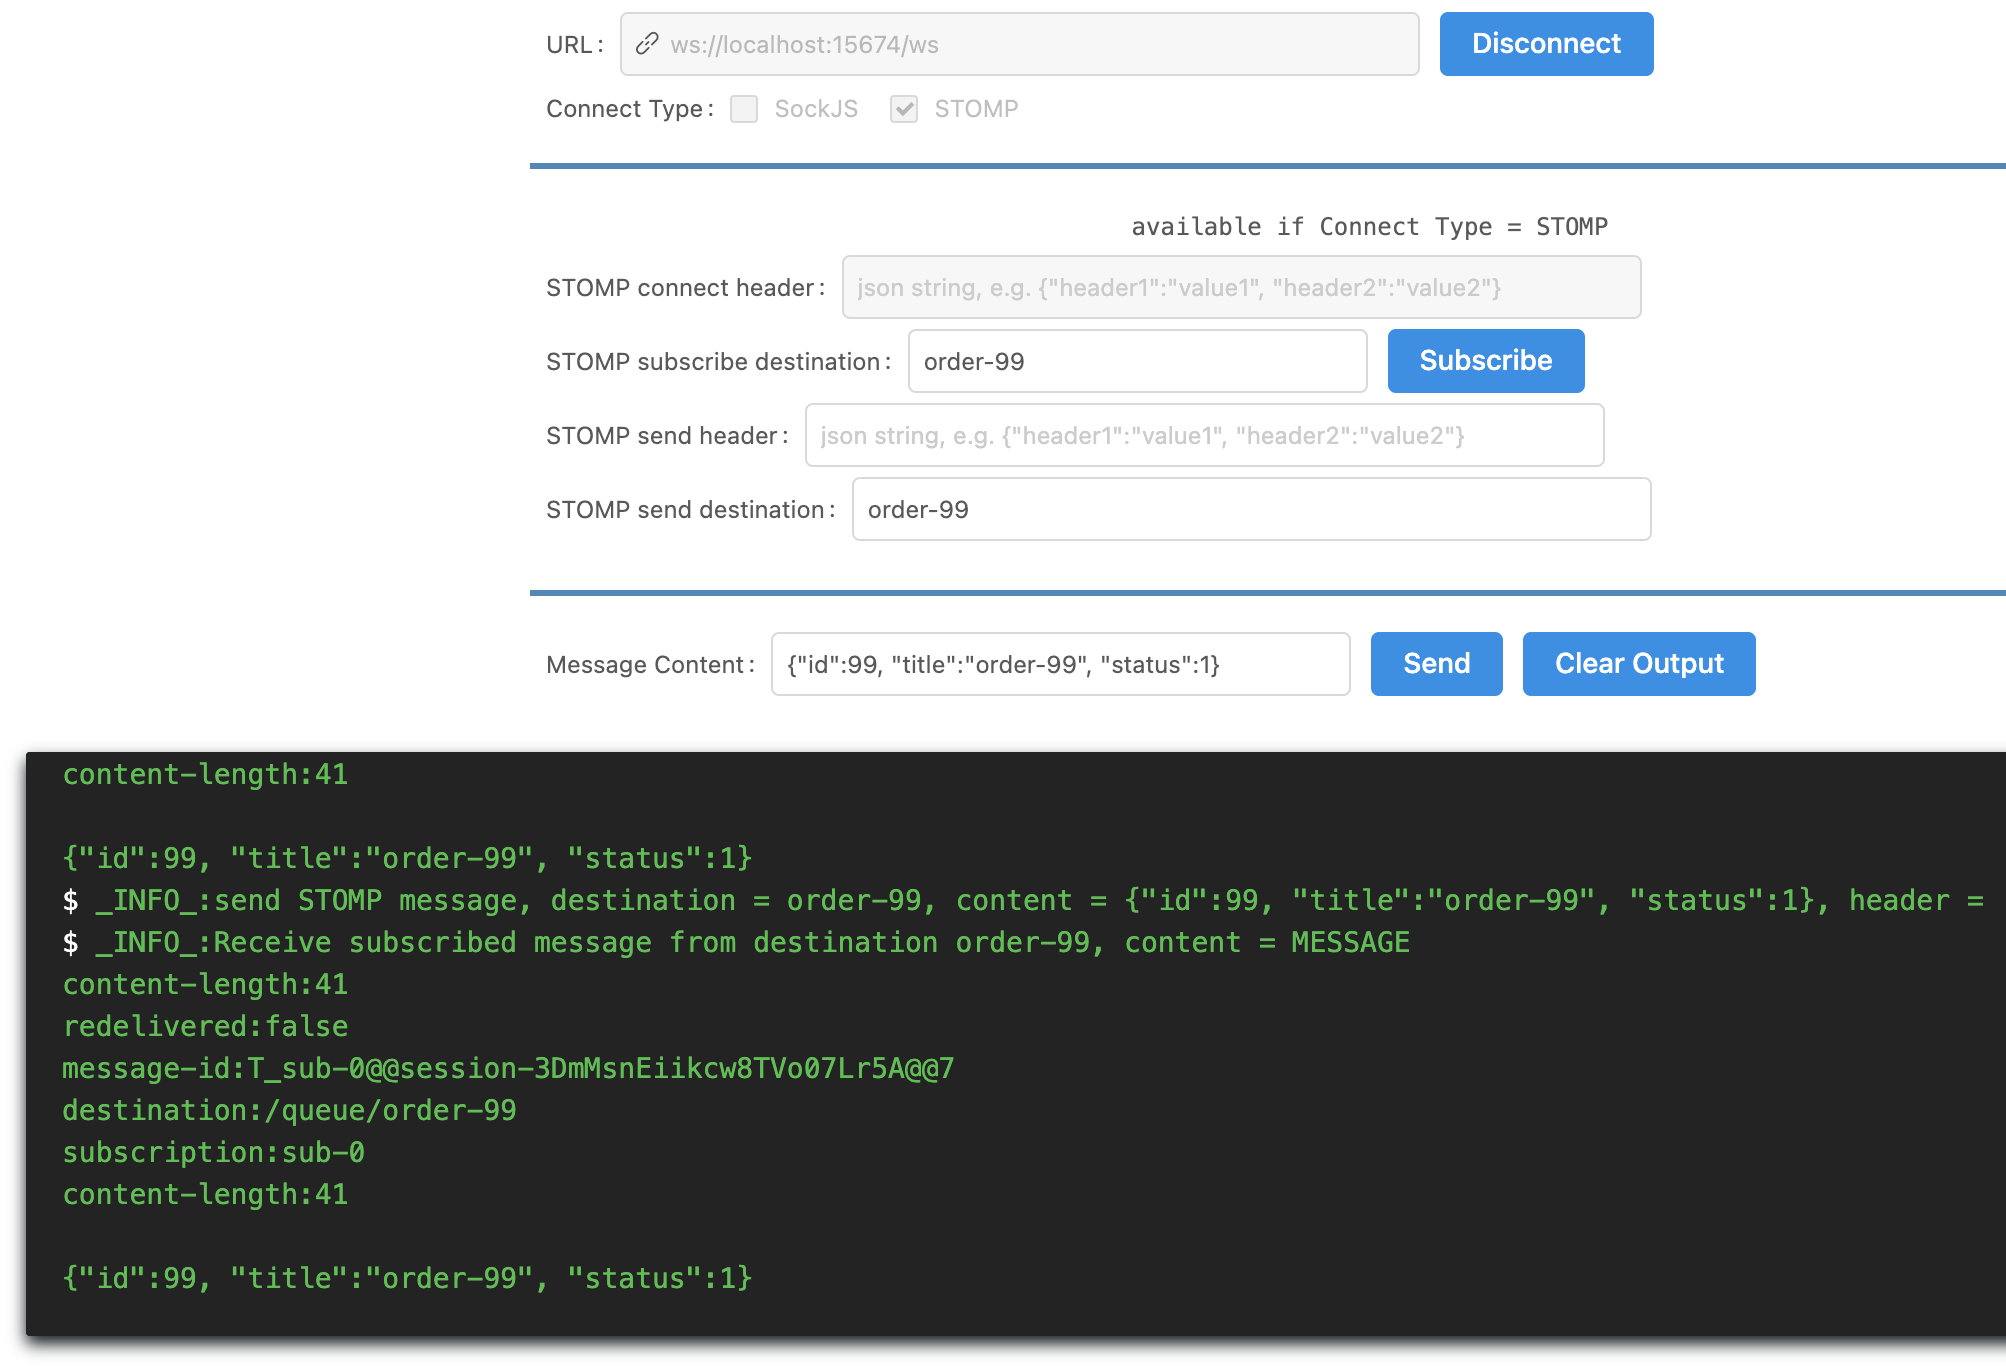
测试工具
http://jiangxy.github.io/websocket-debug-tool
代码
composer.json
{
  "require": {
    "stomp-php/stomp-php": "^5.0"
  }
}
test.php
<?php
require_once __DIR__ . '/../../vendor/autoload.php';

use Stomp\Client;
use Stomp\SimpleStomp;
use Stomp\Transport\Bytes;

// make a connection
$client = new Client('tcp://docker-rabbitmq:61613');
$client->setLogin('guest', 'guest');
$stomp = new SimpleStomp($client);

// send a message to the queue
$body = ['id'=>99, 'title'=>'order-99', 'status'=>0];
$bytesMessage = new Bytes(json_encode($body, JSON_UNESCAPED_UNICODE));
$stomp->send('order-99', $bytesMessage);
echo 'Sending message: ';
print_r(json_encode($body, JSON_UNESCAPED_UNICODE) . "\n");

//$stomp->subscribe('order-99', 'binary-sub-test', 'client-individual');
//$msg = $stomp->read();
//
//// extract
//if ($msg != null) {
//    echo 'Received message: ';
//    print_r($msg->body . "\n");
//    // mark the message as received in the queue
//    $stomp->ack($msg);
//} else {
//    echo "Failed to receive a message\n";
//}
//
//$stomp->unsubscribe('order-99', 'binary-sub-test');
index.html
<!DOCTYPE html>
<html lang="en">
<head>
    <meta charset="UTF-8">
    <title>My WebSocket</title>
    <script src="https://cdn.bootcdn.net/ajax/libs/stomp.js/2.3.3/stomp.min.js"></script>
</head>
<body>
<script>
    if (typeof WebSocket == 'undefined') {
        console.log('不支持websocket')
    }

    // 初始化 ws 对象
    var ws = new WebSocket('ws://localhost:15674/ws');
    var client = Stomp.over(ws);

    var on_connect = function() {
        client.subscribe("order-99", function(message) {
            let result = message.body;
            console.log("收到数据:"+result)
            let r=JSON.parse(result);
            if (r.status===1){
                console.log('已支付');
                message.ack();//确认消息
            }
            // message.nack();//消息驳回,要求ack模式为{ack: 'client-individual'}
            //https://www.cnblogs.com/piaolingzxh/p/5463918.html

        }, {ack: 'client'});
        console.log('connected');
    };
    var on_error =  function() {
        console.log('error');
    };
    // 连接RabbitMQ
    //参数依次为:用户名,密码,连接后,出错,虚拟主机名
    client.connect('guest', 'guest', on_connect, on_error, 'docker-rabbitmq');
    // console.log(">>>连接上http://localhost:15674");
</script>
</body>
</html>
关于STOMP
https://www.cnblogs.com/piaolingzxh/p/5463918.html